Build Customized Form with Ebaas
This tutorial describes how to build a customized form for a class. In the tutorial of "Build your first application with Ebaas", it walks you through a process of creating an Issue Tracking Application. If you haven't read the post, I recommend you read it first.
Introdcution of Form Designer
The Form Designer is a web-based tool in Ebaas. It enables you to create or modify an HTML-based form template which is used by a server-side form engine to render a form.
Unlike other form designers on the market, the Form Designer in Ebaas focuses on layouts of forms, leaving other aspects of form settings to the data model, such as field types, field appearances, validation rules, access controls, options in drop-down lists, etc. Therefore, the process of creating a form template is straightforward.
The Form Designer supports Bootstrap style based layout to design Responsive forms that can be displayed on mobile devices. The implementaion of the Form Designer is based on CKEDITOR.
Tutorial of building a form
The Issue Tracking application you created in the “Build your first application with Ebaas” uses a form generated by Ebaas to create and update an issue. The auto-generated form contains all attributes in the “Issues” class and has a vertical layout in which each row contains one field (See Fig. 1).
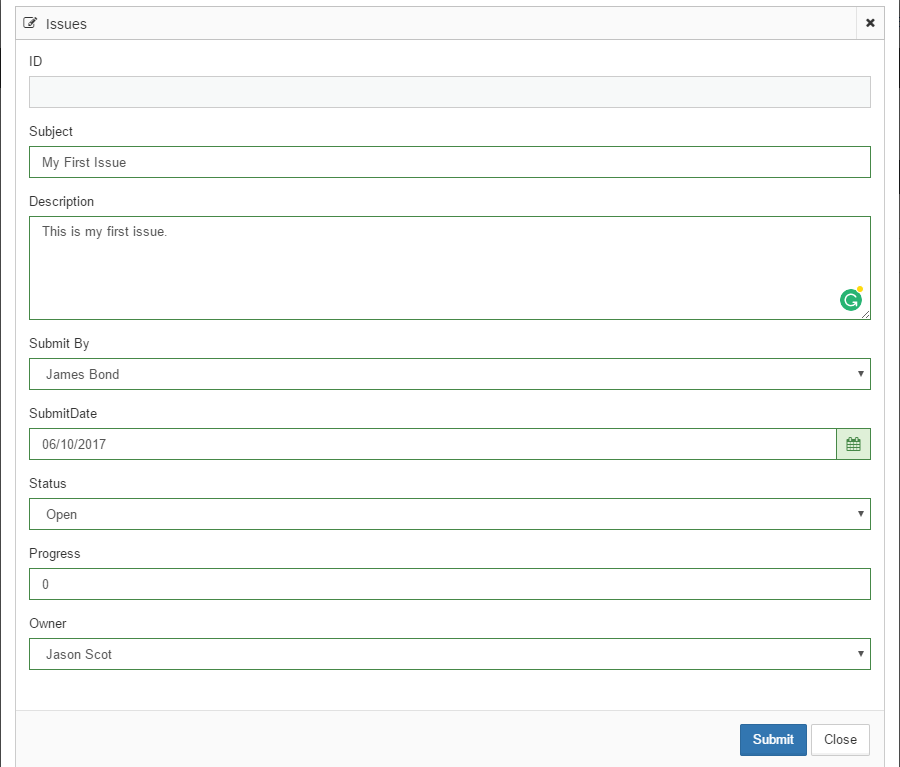 Fig.1: Auto-generated form
Supposed that you want to have a form that has a different layout or number of fields, you can use the Form Designer to build a customized one.
This tutorial will walk you through the steps of building a customized form for the “Issues” class.
Step 1: Open Form Designer
Since the Form Designer is web-based, you need to use a web browser to connect to the Ebaas server at http://localhost:8080, and log in as “demo1” user with password “888”. The “demo1” user has a role of the Administrator.
Once logged in, you will find “Form Designer” menu item (see Fig. 2). Click the menu item to open the Form Designer.
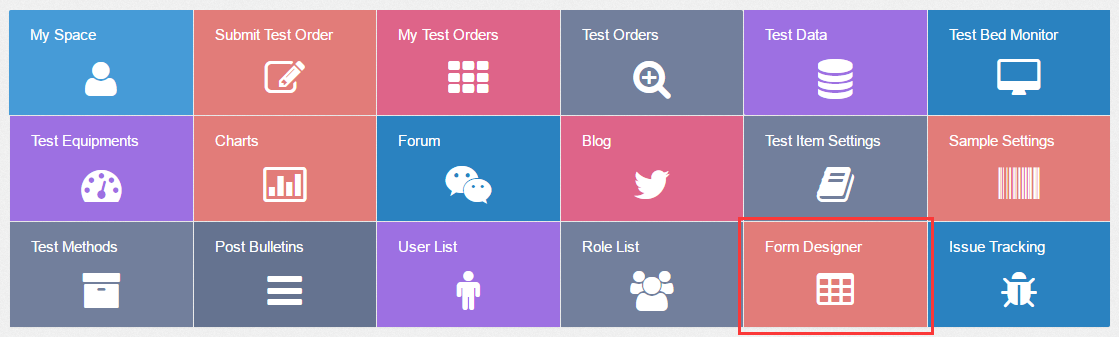 Fig. 2: “Form Designer” menu item
Step 2: Create a form template
To create a new form for the “Issues” class, follow the steps as illustrated in Fig. 3.
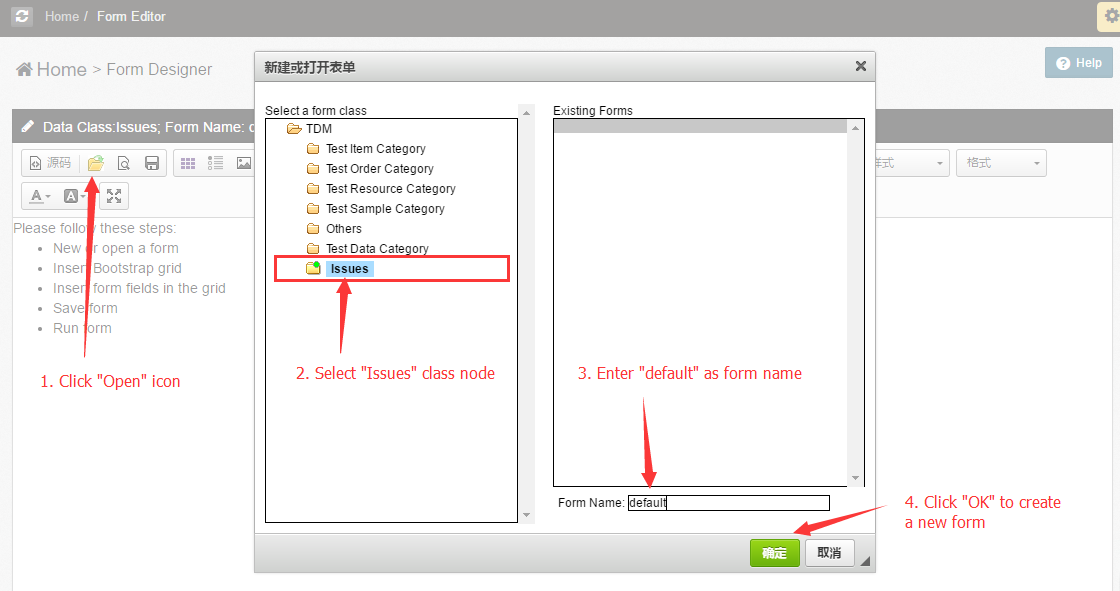 Fig. 3: Open a new form
Note: The form with name “default” is used to replace the auto-generated form. Forms with names other than “default” are used by custom commands that will be covered in another related topic.
Step 3: Insert form title
To create a form title, type “Issue Form” in the area and format the text with the formatting commands in the toolbar (See Fig. 4).
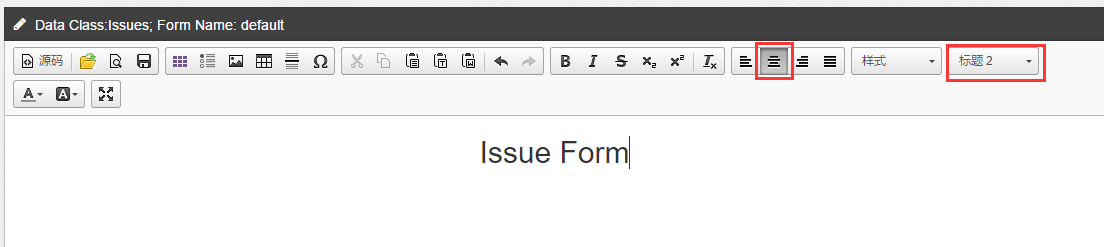 Fig. 4: Insert Form Title
Step 4: Insert Bootstrap grid
Here you want to use Bootstrap grid as form layout, which makes the form responsive.
To insert a Bootstrap grid, click “Insert Grid” icon in the toolbar (See Fig. 5), specify the number of rows and columns of the grid to be inserted in a dialog, and click “OK”. A grid will be placed at the cursor position in the form.
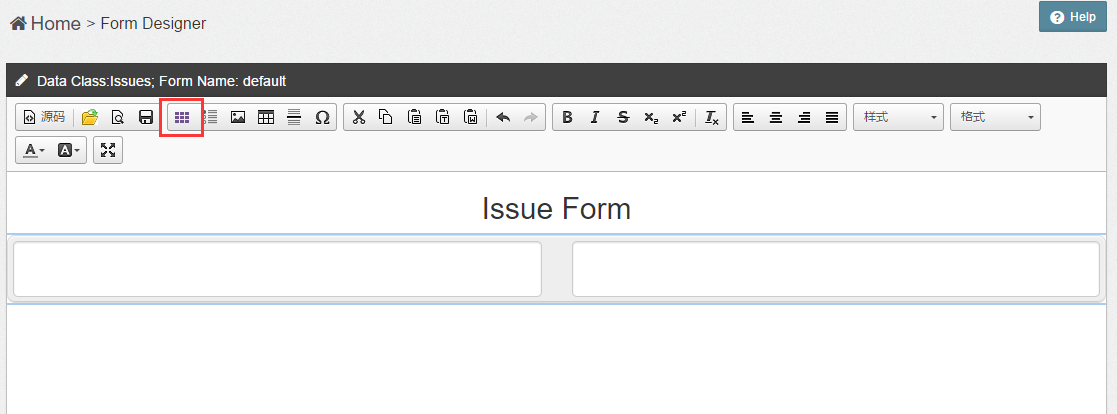 Fig. 5: Insert a grid in form
For the form for an issue, you can create a layout like that in Fig. 6 or your own design.
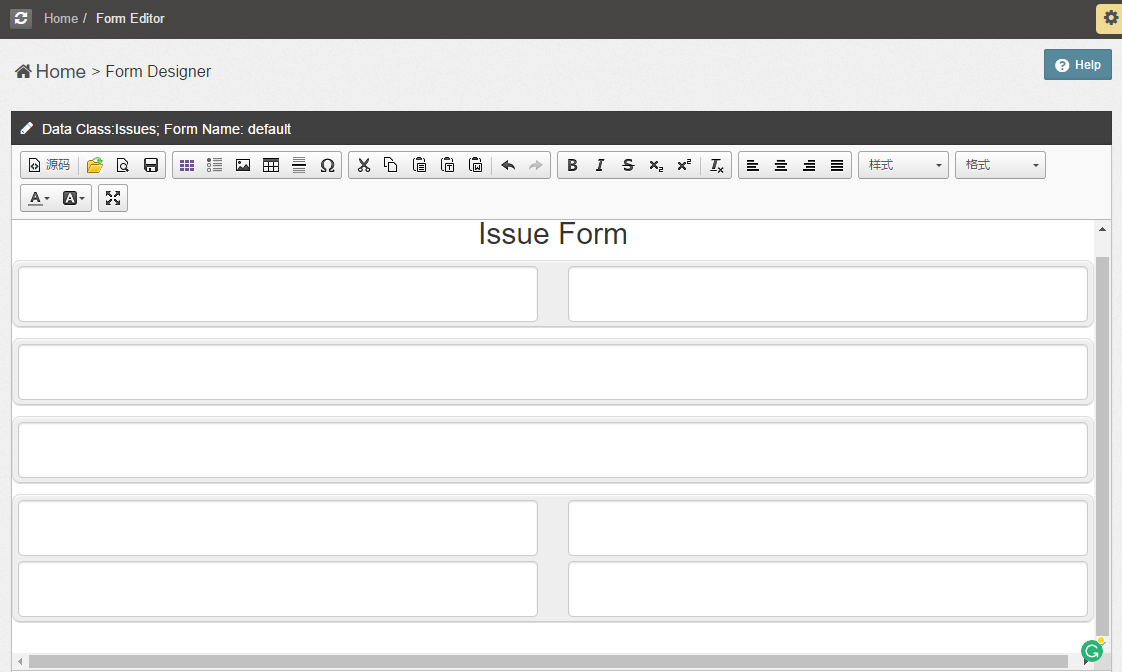 Fig. 6: An Issue form layout
Step 5: Insert form fields
Now, you can insert attributes of the “Issues” class one by one into cells of the form. Fig. 7 shows the steps of inserting the “ID” attribute into a cell.
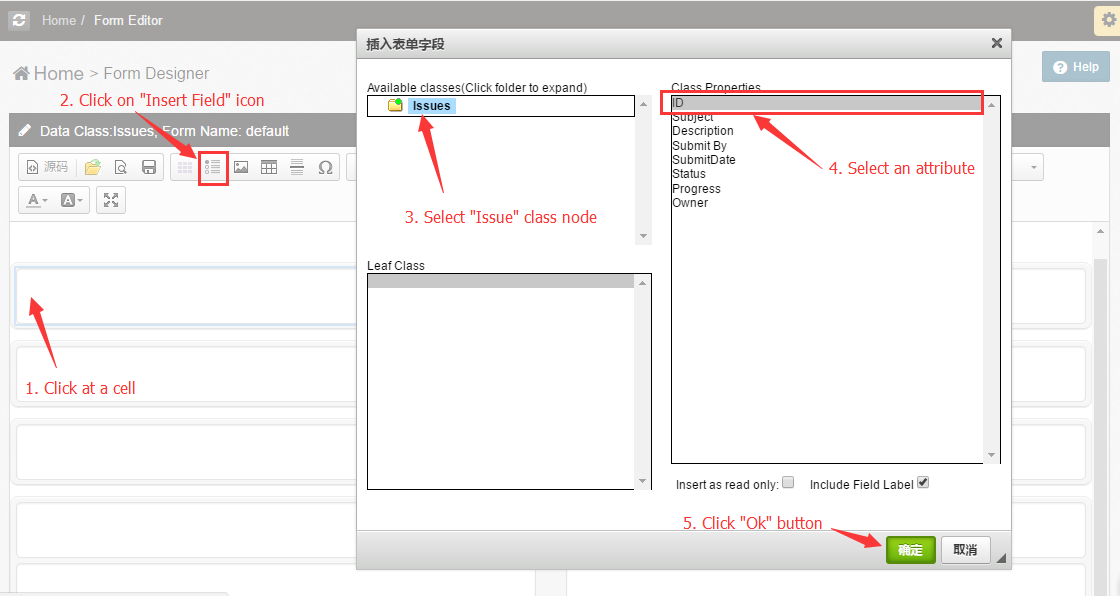 Fig. 7: Insert “ID” attribute into form
Step 6: Save form
When you fill up all cells in the form with the attributes, you need to save the form by clicking the “Save” icon on the toolbar (See Fig. 8).
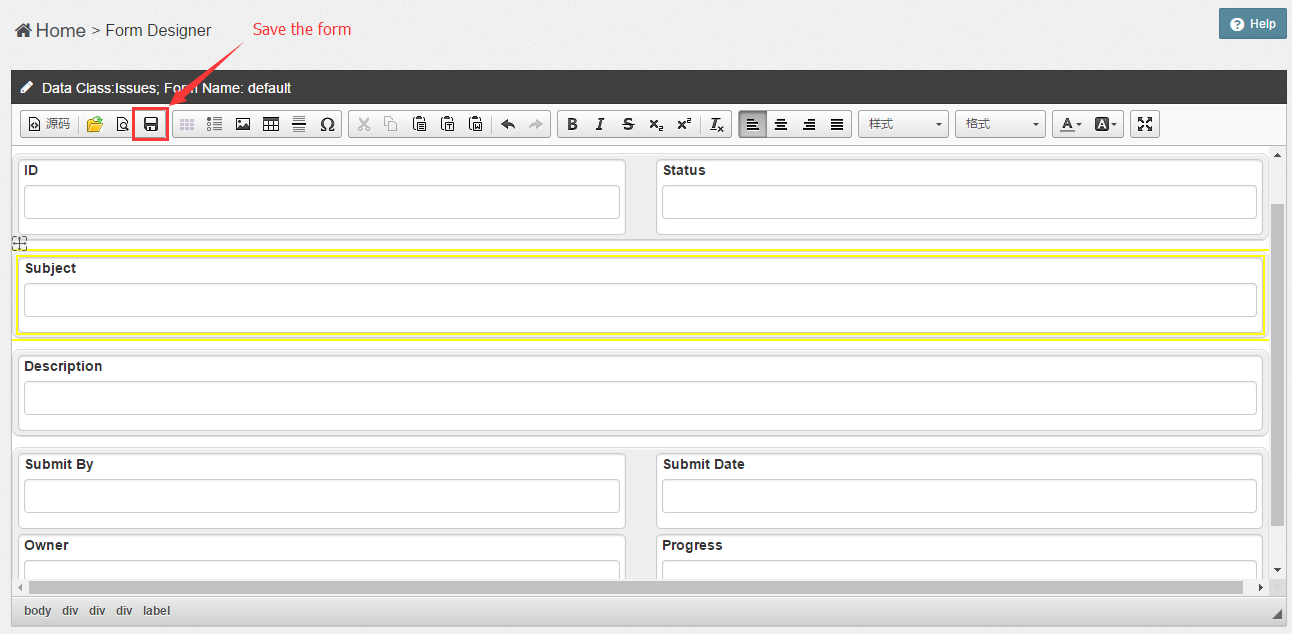 Fig. 8: Save the form
Step 6: Preview form
The appearance of a form is its editing mode is different from that of its working mode. To see the actual form, you can click on the “Preview” icon on the toolbar (See Fig. 9).
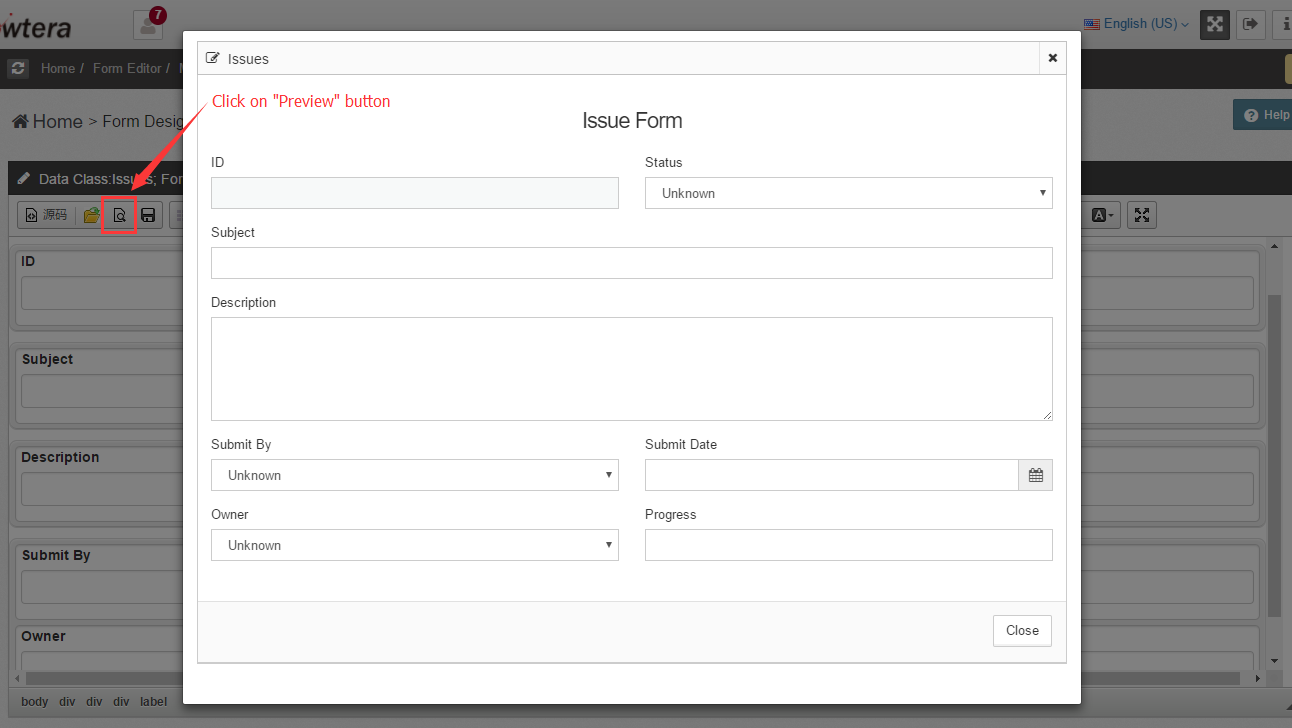 Fig. 9: Preview form
By now, you have created a customized form that will replace the auto-generated form. You always come back to the Form Designer later to modify the form when you need to make some changes to it.
Try it out
Now, if you go back to the “Issue Tracking” page from the “Home” page, click the “+Add” button or the “Edit” button of any issue instances, you will see the customized form you just built popping up (See Fig. 10)
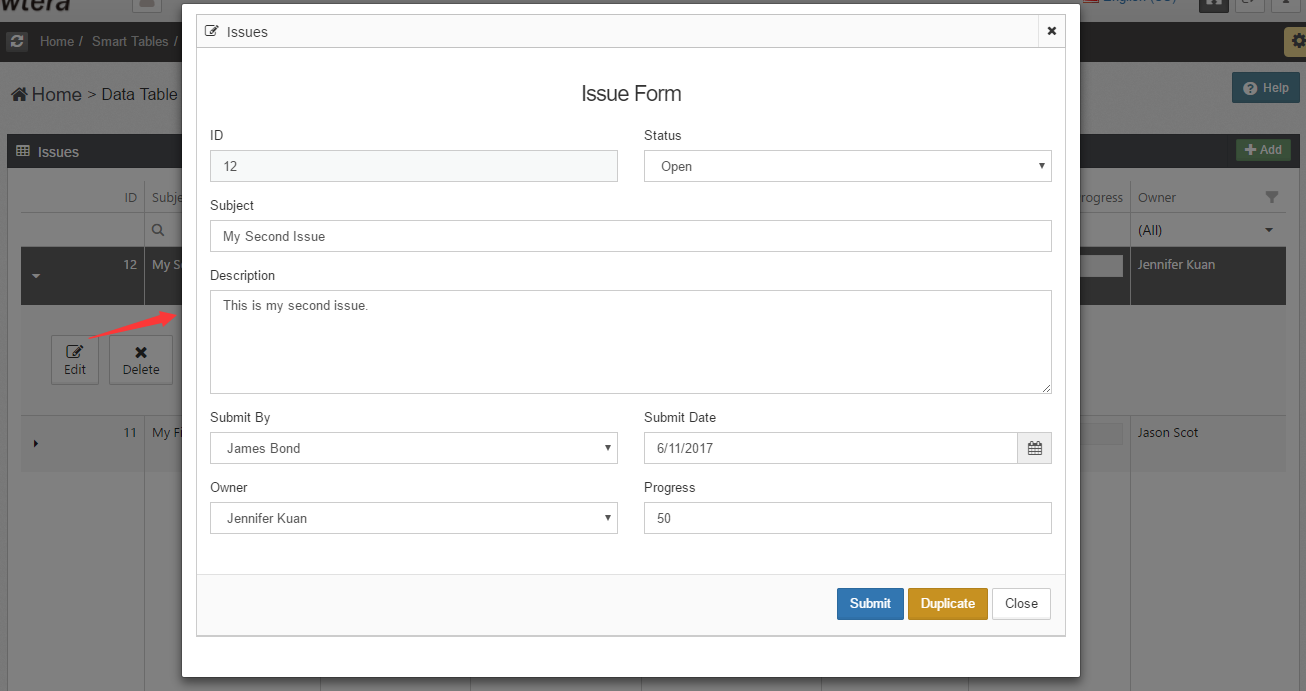 Fig 10. The customized Issue form