Enable Role-based Access Control
Role-based access control is a method of regulating access to data based on the roles of individual users within an enterprise. In this context, access is the ability of an individual user to perform a specific task, such as read, create, update, or delete a data instance. Roles are defined according to job functions and departments within the enterprise.
In Ebaas, an access control policy consists of role-based access control (ACL) rules. An ACL rule has four elements:
- Object: The object to which the rule applies. The object can be a data model, a class, or an attribute.
- Subject: The subject of the rule, which can be a role, combination of roles, or an individual user.
- Actions: A set of actions of the rule, which can be read, update, create, upload, and delete.
- Permission: The permission to each action in the rule, which is either “Grant” or “Deny”.
An access control policy is part of a data model and is saved with the data model in the database. During the runtime, an access control engine on the server side checks each request from clients against the policy and determines whether to grant or deny the request. The UI components are also driven by the policy to display or hide functionalities according to a user’s privilege.
When you create a class in a data model, the access to the class is granted to everyone by default. If you want to have some access controls on the class, you need to create access control rules. It is easy to create the rules using the DesignStudio tool. This tutorial will walk you through the steps of creating ACL rules for the Issue Tracking application you built in the “Build your first application with Ebaas” tutorial.
Supposed that you want to create access control policy to enforce the following rules:
- Rule #1: Users with Administrator role can create, update, or delete instances in “Issues” class.
- Rule #2: Only users in the “LabA” department can create or update, but delete, an instance in “Issues” class, with the condition that the instance’s status is not “Closed”.
Here are the steps describing how you implement these requirements. Make sure the Ebaas server is running.
Step 1: Open the DesignStudio
You launch the DesignStudio at Start->Ebaas->DesignStudio.
Step 2: Open the data model
Select the “TDM” data model which contains the “Issues” class, log in as the admin user. The username for the admin user is “admin” and the default password is “admin” too.
Step 3: Override the default rule
Select the “Issues” class node under “Classes” node in the tree, and click on the “Access Control” tab on the right (See Fig. 1).
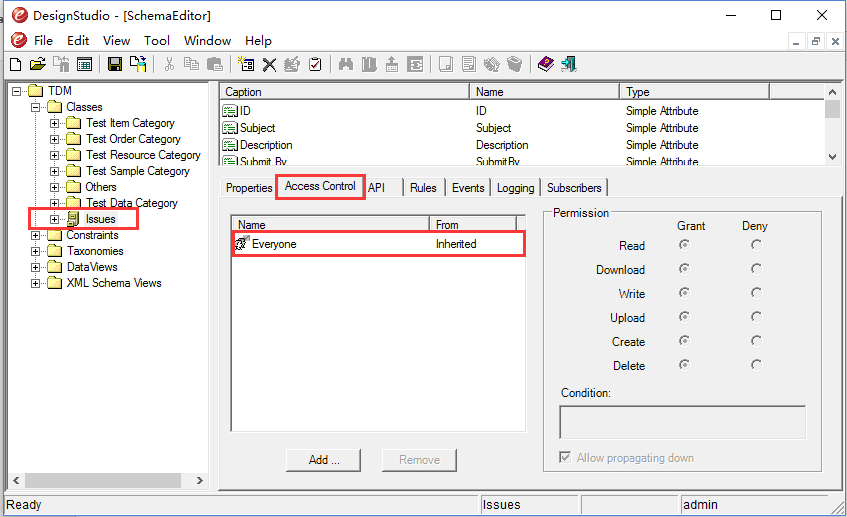 Fig.1: Default access control rule of the “Issues” class
Notice that there is a default rule that grants all permissions to every user (every user has a role of Everyone). This rule is defined at the data model level (Click root node to view it) and is inherited by all classes including the “Issues” class. Being able to define rules at a data model level is like defining global rules, which simplifies the work of setting up access control policy.
Since the inherited rule doesn’t meet our need, you can create a local rule to override it.
What you want to do is to create a local rule that only allows read access to the “Issues” class by following the steps shown in the Fig. 2.. Make sure to click “Yes” for the confirmation.
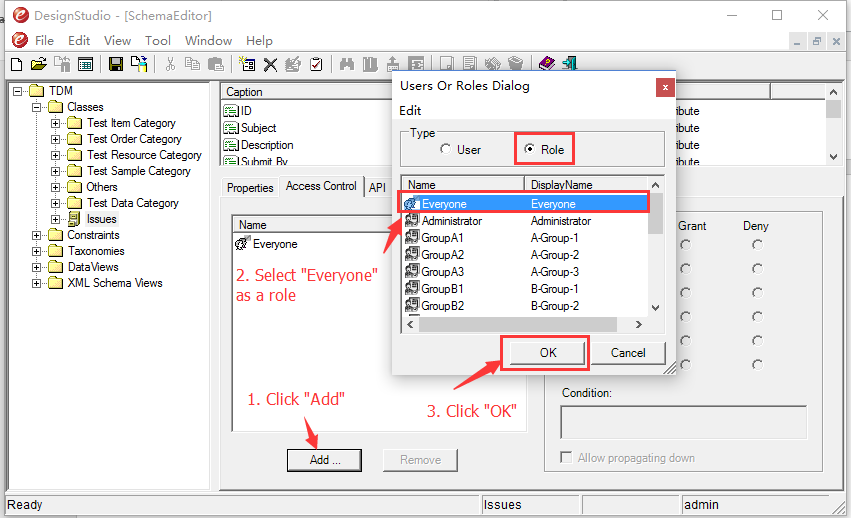 Fig.2: Create an overriding rule
You add a local rule that replaces the inherited rule. Then set read and download permissions as “Grant”, rest of permissions as “Deny” (See Fig. 3).
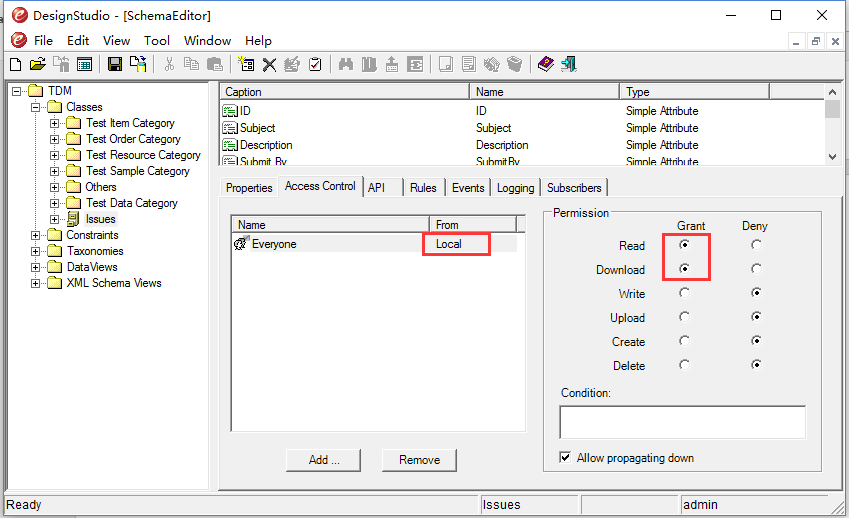 Fig.3: Set permissions of the local rule
You have created a base rule that only allows read and download access to the class. You will add rules to the class to give other permissions to the dedicated roles.
Step 4: Create Rule #1
Rule #1 is easy to create, just add a rule for the Administrator role, give it all permissions (See Fig. 4)., which gives the users with Administrator role all permissions to issues.
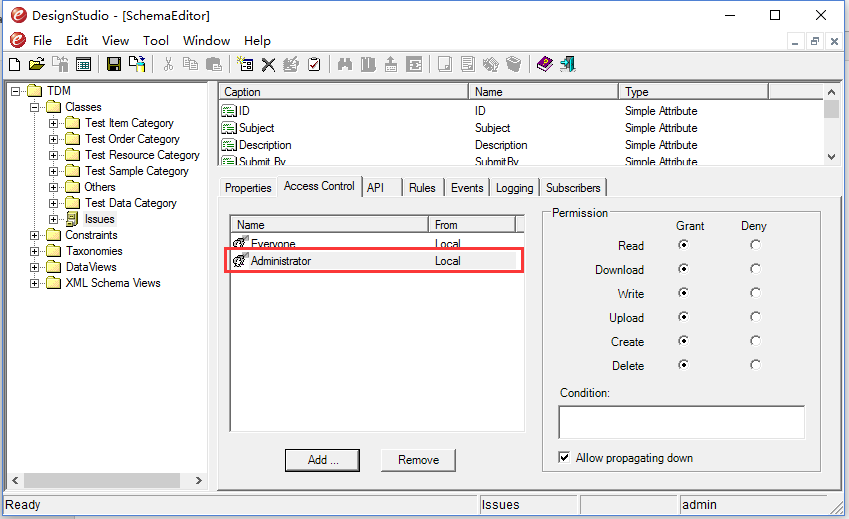 Fig. 4: ACL rule for Administrator
Step 4: Create Rule #2
To give the users in the “LabA” department the rights to read, update, and create issues, you can create a rule for the “LabA” role with the read, update, create permissions.
But the rule #2 has a condition stating that the rule is valid when an issue’s status is not “Closed”. In other words, if an issue’s status is “Closed”, it becomes read-only.
This is an example of creating an ACL rule with a condition. which is also known as the instance-based access control.
For the rule #2, you can create a rule shown in Fig. 5:
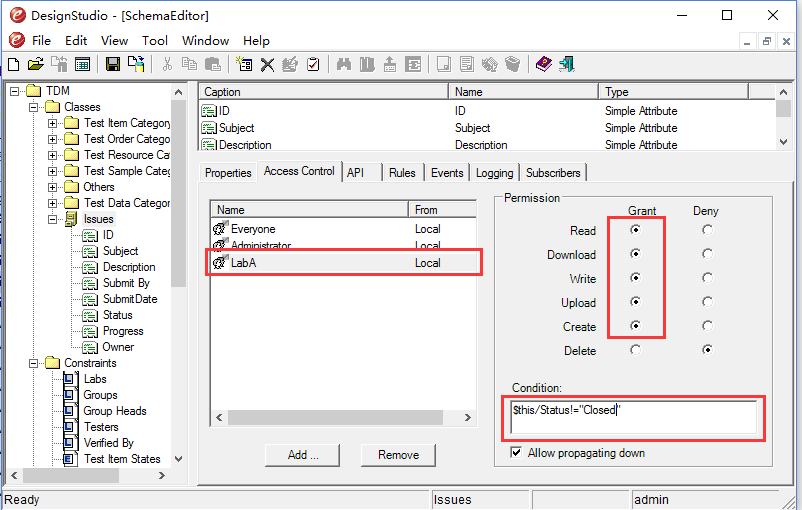 Fig. 5: The ACL rule for Rule #2
Where the condition
$this/Status!="Closed"is a XQuery expression used by the engine to check if an instance meets the condition. If true, the rule applies. Otherwise, the engine doesn’t use it.
Step 5: Save the data model
Click the icon of “Save to database” on the toolbar to save the data model to the database.
Step 4: Verify the access controls
Let’s first check the Rule #1. Use a recommended web browser to connect to the application at http: // localhost: 8080.
Log in as “demo1”, who has the Administrator role. The password for “demo1” user is “888”.
Open the “Issue Tracking” page, open the edit form for an issue, change its status to “Closed”, and submit the form. (See Fig. 5).
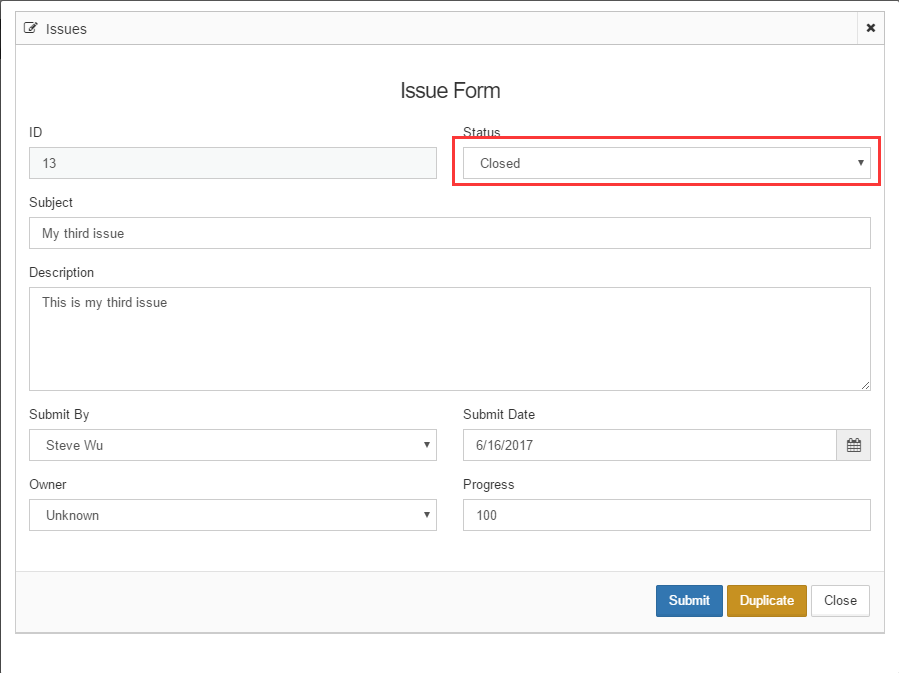 Fig. 6: Change an issue’s status to “Closed”
With the “Closed” status, demo1 is still able to update and delete the instance (See Fig. 7). So, the Rule #1 works.
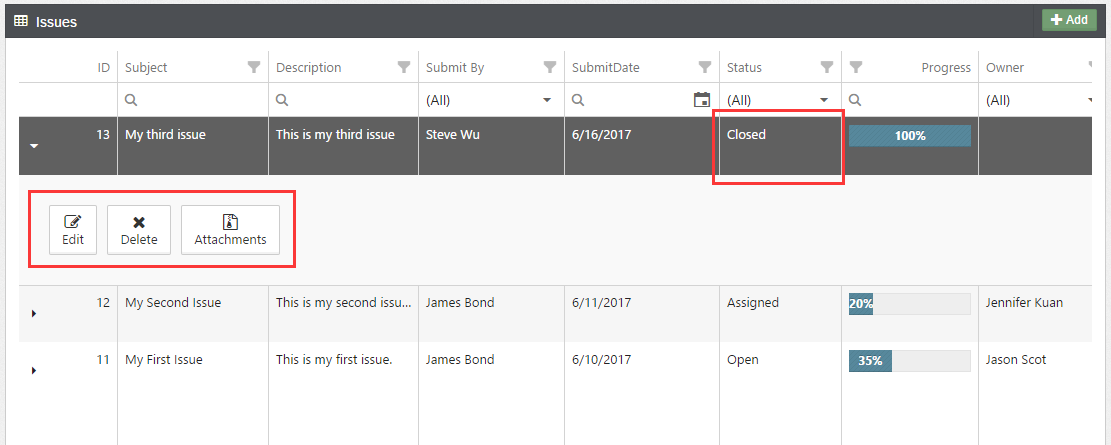 Fig. 7: Allowing update or delete on the closed issues for Administrator
Then, let’s check the Rule #2. Sign out the “demo1”, Log in as “demo2”, who has the “LabA” role. The password for “demo2” is “888”.
Open the “Issue Tracking” page, click on the issue whose status is “Closed”. There is no “Edit” or “Delete” command in the command bar (See Fig. 8), which is expected.
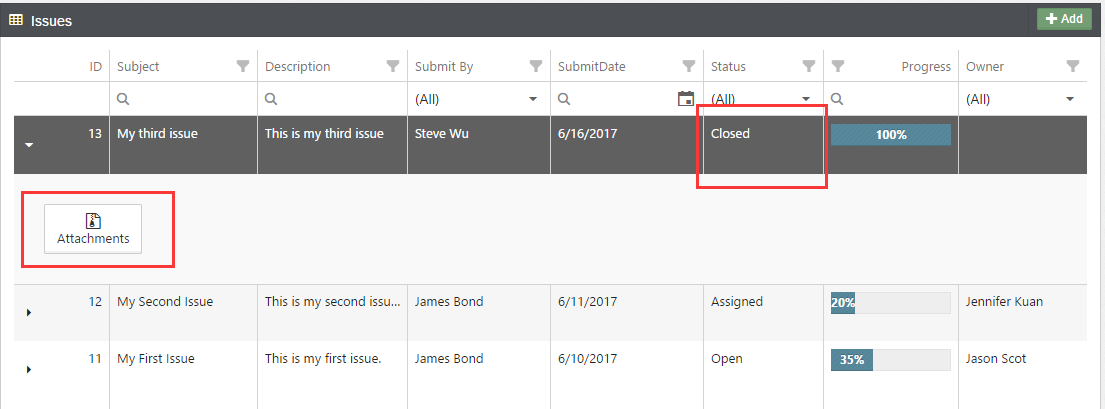 Fig. 7: No update or delete on the closed issues for the “LabA” users
Now, click on an issue whose status is not “Closed”. There is an “Edit” command in the command bar (See Fig. 9), which is expected too.
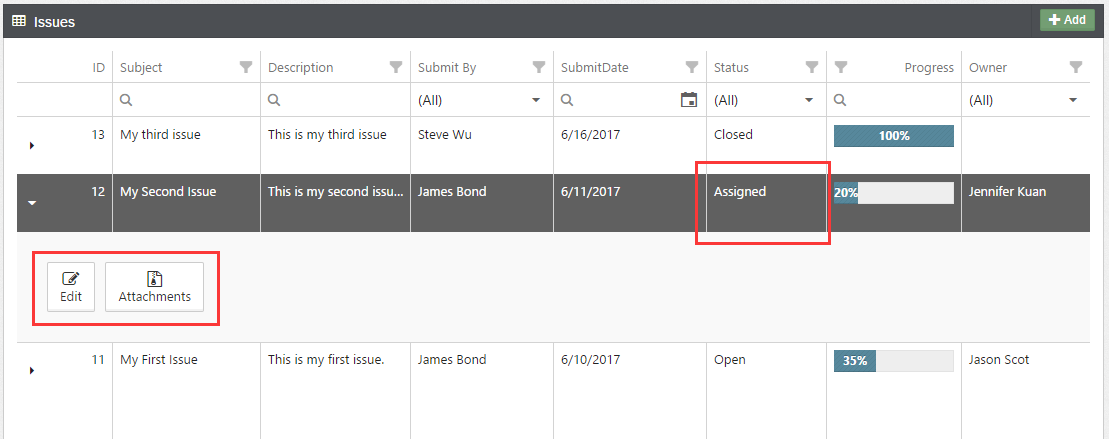 Fig. 9: Allowing update on the issue not closed yet
I have briefly introduced how access controls work in Ebaas. More advanced topics, such as rule conflict resolution, access controls on attributes, etc., which will be described in future posts.