Import Data Using ETL
ETL tool in Ebaas is an intuitive and wizard-based tool you can use to extract data from files, transform it into the desired structure, and load it to a target destination. Its primary focus is simplicity. You don't have to study yet another complex XML-based language or use SQL to perform the work.
In this tutorial, I describe the process of importing data from a file using ETL. We are going to use the “Issue Tracking application” as an example, which is outlined in the “Build your first application with Ebaas” tutorial.
Extracting data
Supposed that you want to import a file that contains issue records into the “Issues” class. For your continence, I have included a sample file that you can use for the tutorial. You can find the file at the location:
C:\Program Files\Ebaas\Example\ImportFiles\issues.csvThe file contains some fake issue records (See Fig.1 )
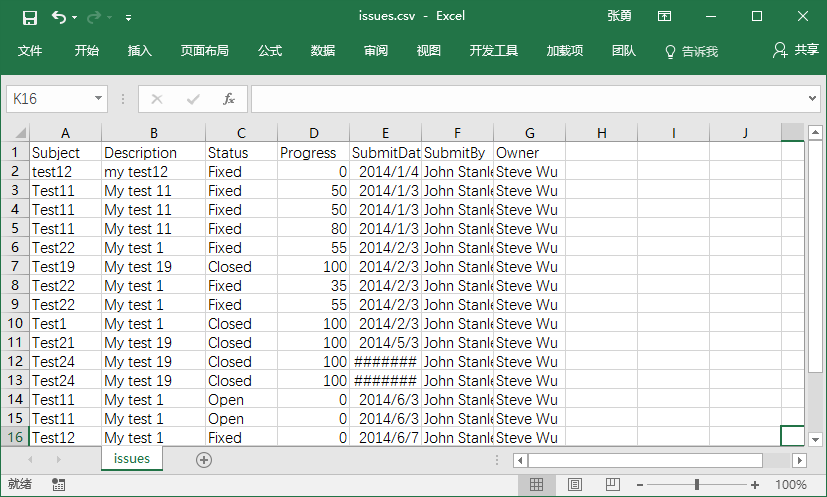 Fig.1: Sample file
Here are the steps describing how you perform the task. Make sure the Ebaas server is running.
Step1: Open the data import wizard
The data import wizard is a part of the DesignStudio. So you can launch the DesignStudio at Start->Ebaas->DesignStudio.
Then, open the import wizard by clicking the “Import Data…” menu item under the “File”. You need to select the “TDM” data model and log in as the admin user. The username for the admin user is “admin” and the default password is “admin” too. The wizard should show up next.
Step2: Select a file
In the first step of the wizard (See Fig. 2), choose the “Text File” as the data source (CSV is text format), and then select the sample file.
The wizard supports extracting data from various file formats, including text, Excel, binary files.
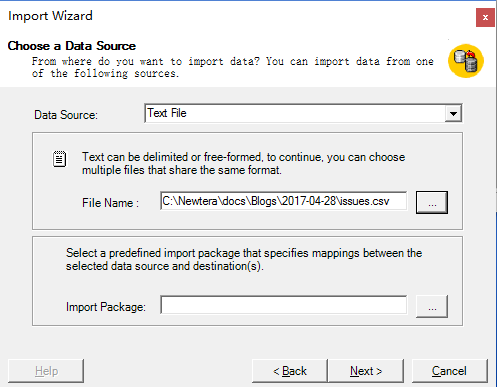
Fig.2: Select file and its format
Step2: Determine file format
The second step of the wizard is to determine how to parse the file correctly. For the sample file, you would pick the settings as shown in Fig.3.
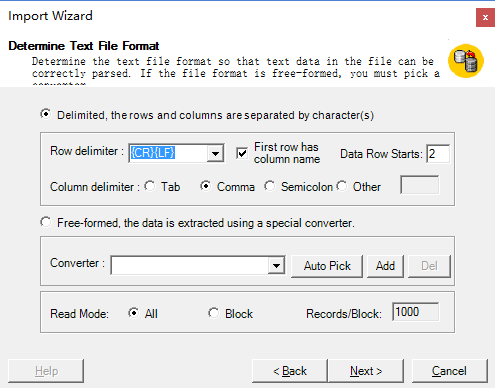
Fig.3: Determin the file format
Step3: Preview the extracted data
The third step of the wizard is to preview the data extracted from the file using the settings (See Fig. 4). If the extracted data doesn’t look right, you can go back to the previous step to change the settings and try again.
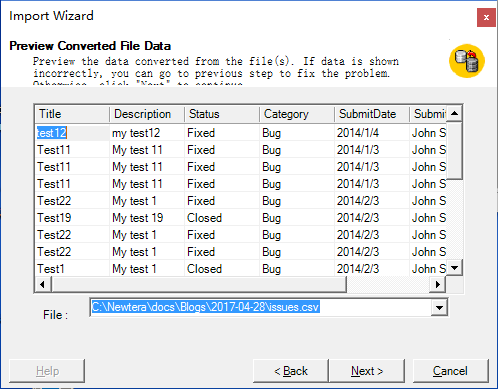
Fig. 4: Preview of the extracted data
Transform data
Step3: Select the destination
The fourth step is to select the “Issues” class as the destination class (See Fig. 5).

Fig. 5: Select the destination
Then, create mappings between the source (extracted data) to the destination by clicking “…” in the “Transform” column, a “Transform dialog” pops up.
In this dialog, you map the source attributes to the destination attributes by clicking the dots to establish the connections (see Fig. 6). You can also write some scripts here to convert or combine the original values to the desired format.
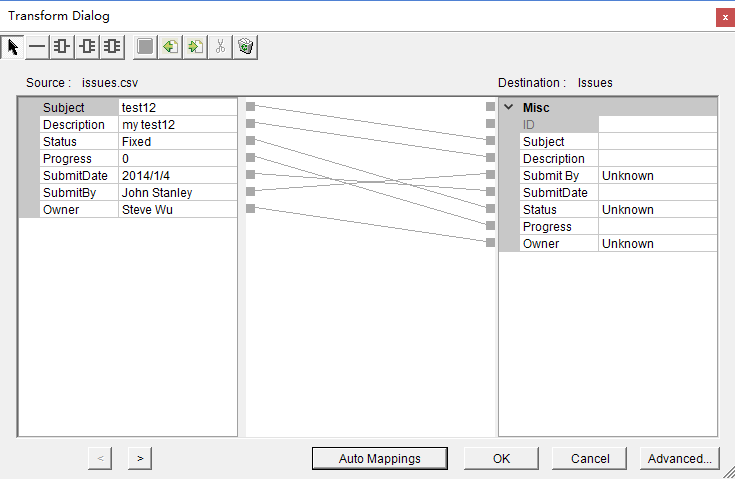 Fig. 6: Transform data
The fifth step of the wizard allows you to examine and validate the transformed data (see Fig. 7). If the data doesn’t look right, you can go back to the previous step to correct it.
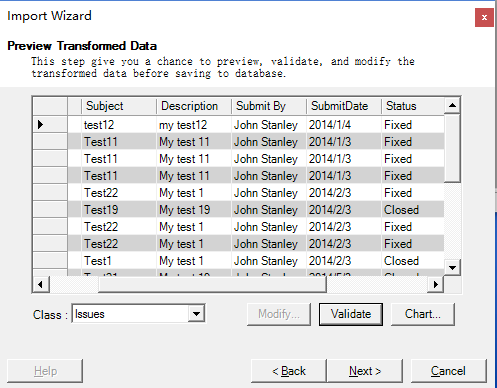
Fig. 7: Preview transform data
Load data
In the sixth step of the wizard, you click “Next” button to start importing the transformed data to the database.
If this is a repetitive task, you can save the configuration as an import package by giving it a name as shown in Fig. 8. You will be able to use the import package next time you perform the task without going through the process of the configurations.
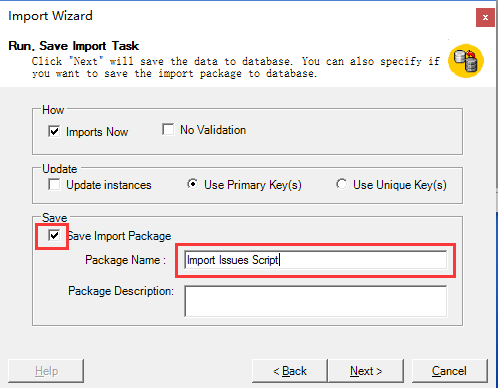 Fig. 8: Import the transform data or save as an import package
Enable import and export data for the web client
Since you have saved the import configuration as a package, you can perform the import task using a web browser instead of using the DesignStudio tool, which is more convenient.
To enable import and export data for the web client, use the SiteMapStudio tool to configure it.
Step 1: Open the SiteMapStudio tool
Open the SiteMapStudio tool at Start->Ebaas->SiteMapStudio, click on the “Open” icon on its toolbar, log in as the admin user with “admin” as the username and the “admin” as the password.
Step 2: Change setting of the menu item
Click on the “Issue Tracking” menu item under the “Main Menu” node, modify the setting of the “Navigation URL” as shown in Fig. 9. The new URL is:
app.smarttables.datagrid({import:true, export:true})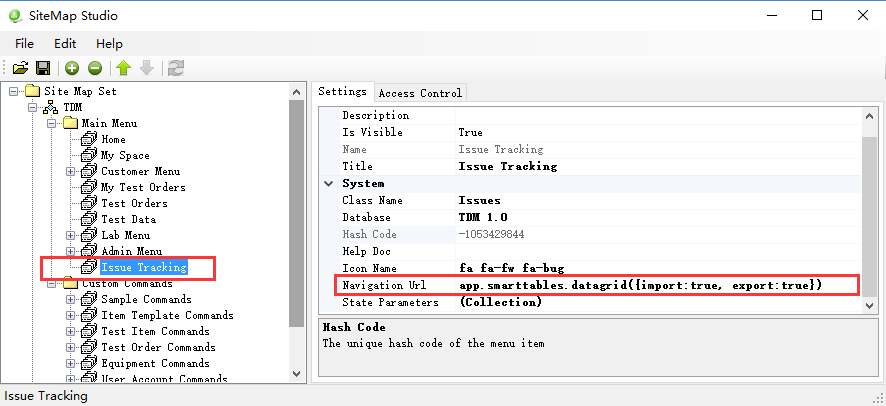 Fig. 9: Enable import and export
Step 3: Save the sitemap model
Click the save icon on the toolbar to save the sitemap model.
Note that you must restart the Ebaas Server to make the changes effective.
Step 4: Try it out
Use a recommended web browser to connect to the application at http: // localhost: 8080.
Log in with “demo1” as the username and “888” as the password.
Open the “Issue Tracking” page, and you will see the “Export” and “Import” buttons appearing on the right of the title bar (see Fig. 10).
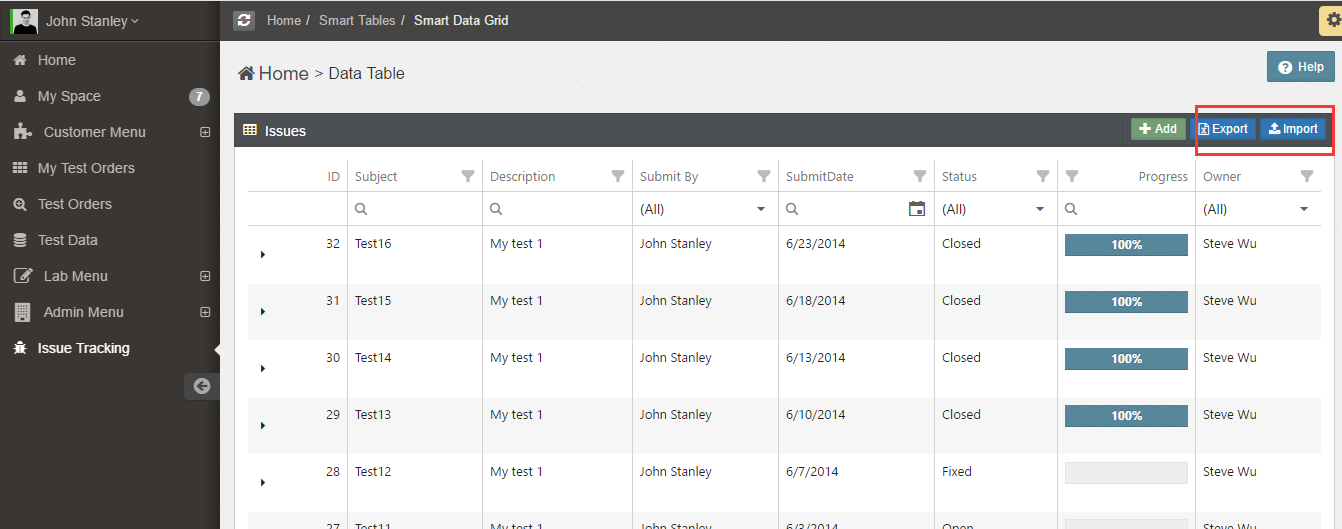 Fig. 10: The datagrid with import and export enabled
Click on the “Import” button to open a dialog (see Fig. 11) in which you can select an import file and the import package created with the DesignStudio, and perform the data import task using a web browser.
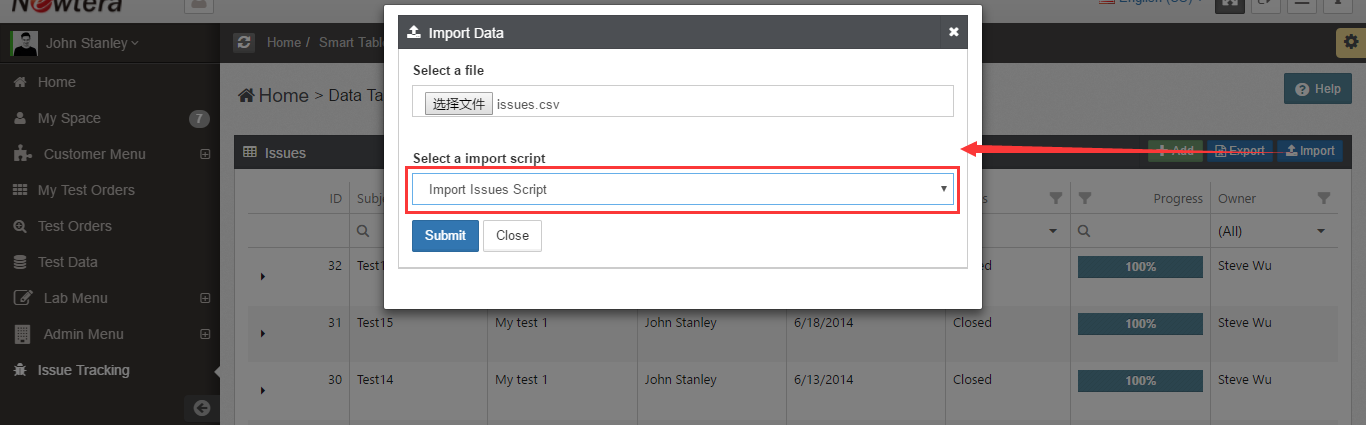 Fig. 11: Perform import with the canned import package